Donna Salazar's Spellbinders Rose |
| I created this cute flower using the Spellbinder's Rose Creation dies by Donna Salazar. |
 |
| Cut two each of the three largest die flowers. |
 |
| Spritz with glimmer mist and let dry. |
 |
| Using Glossy Accents glue, fold up the first layer to form a flower bud. |
 |
| Put a dot of glue on each petal of the next layer. |
 |
| Fold each petal up and out. Repeat for the next layer. |
|
| Pinch the remaining petals making sure the layers are offset. Add Glue between the layers to prevent spinning. Brush on Glossy Accents and sprinkle on extra fine glitter. |
Spellbinders Blossom Two Flower

I made this pretty flower using the following supplies:

* Spellbinders Nestabilities Blossom Two dies
* McGill Paper Blossoms Matt and Styluses
* Distress Ink
* Gimmer mist (either store bought or homemade)

Cut four each of the three smallest Blossom Two Spellbinder dies.

Cut a small slit between each petal.


Ink the edges of the petal.

Spray with glimmer mist if desired.

After petals have dried, use your McGill stylus and cup everyother petal up. Then flip the flower over and cup the remaining flowers in the opposite direction.
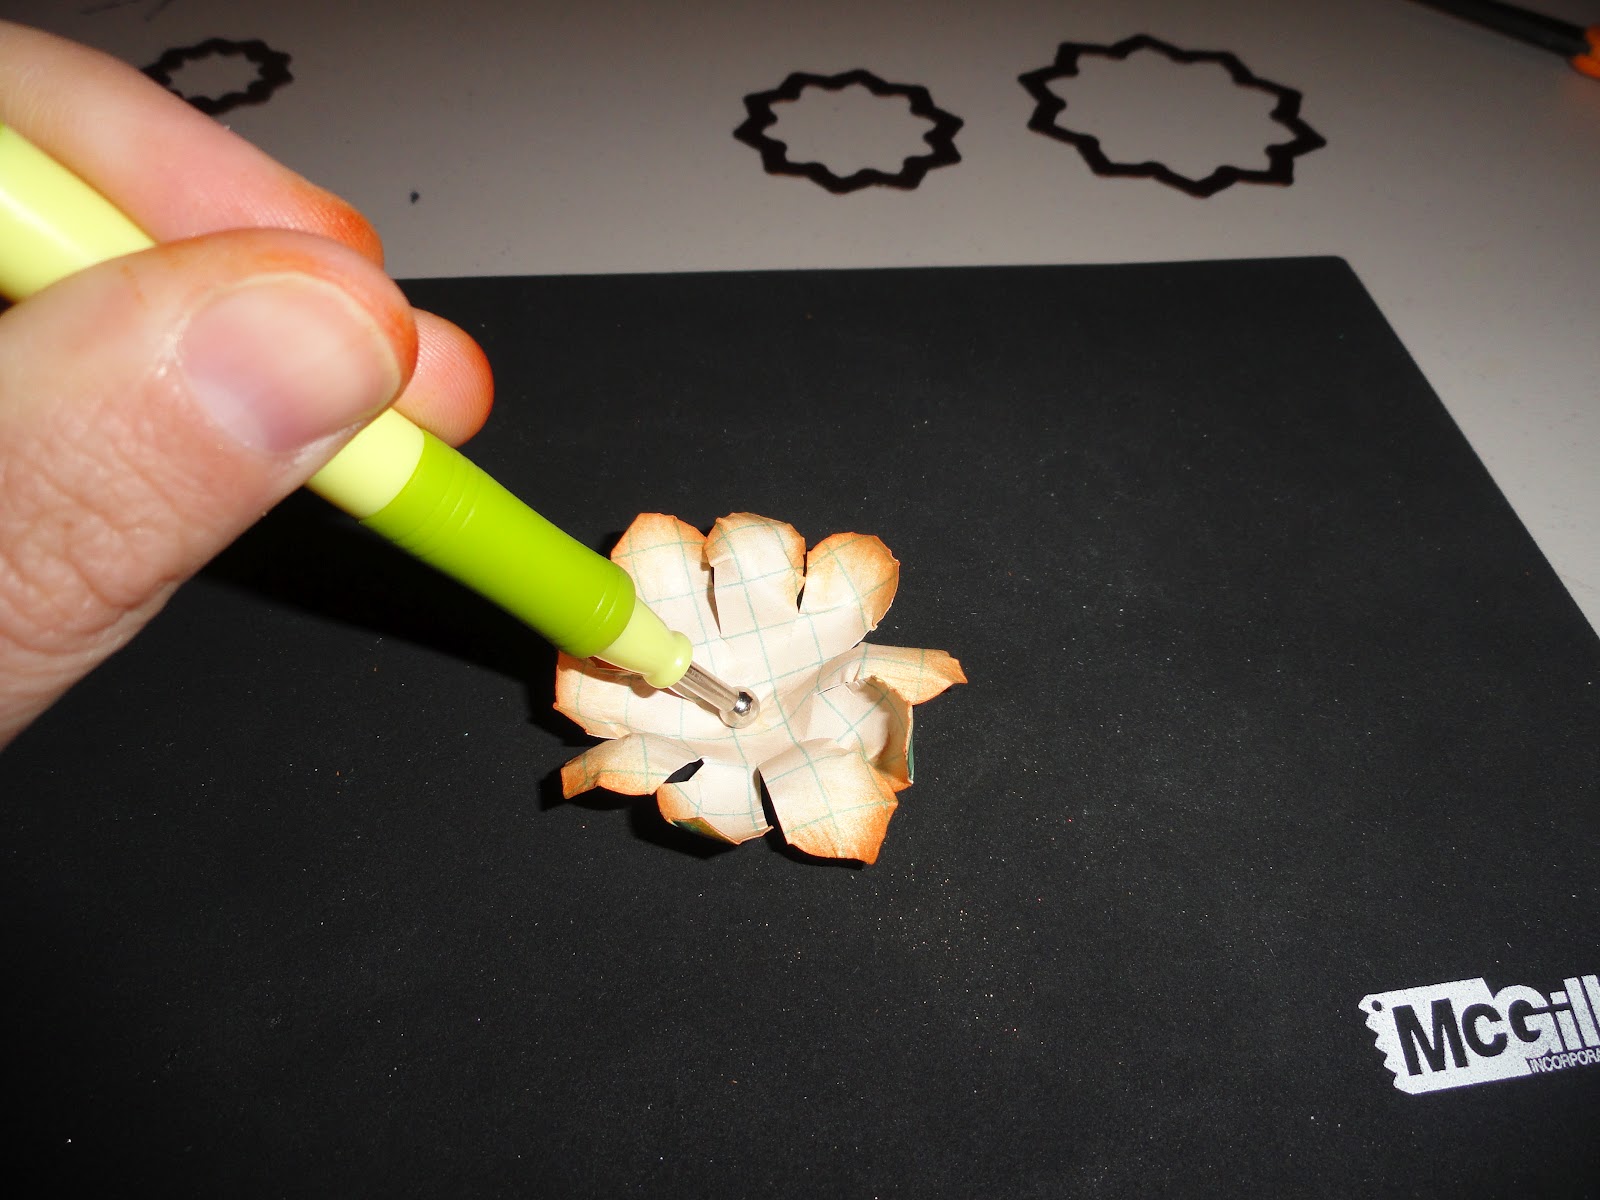
Cup the center of the flower.

Glue the flowers together, alternating the petals.
Glue a small jewel in the center of flower.
Hi all,
This is my first tutorial so if the format is weird I'm sorry. I made these ruffly roses using my Cricut machine and the Mother's Day Bouquet Cartridge. I hope that you enjoy it and that you are able to use this technique on your own projects.

I used the following supplies:
Cricut Expressions
Mother's Day Bouquet Cartridge
Modern Romance Flower Sprays (Stamens for flower centers)
Distress Ink Tattered Rose
Tacky Glue
Fabri-Tac Permanent Adhesive
Bazzill Basics Paper Avalanche
 |
First cut five of flower #10; two at 3", one at 2.75", and two at 2.5"
Next, cut two of flower #31 (Daisy shape) at 1.75" and 1.25"
|
 |
| Next, ink the edges of the flowers with the Tattered Rose Distress Ink. |
 |
| After all of your flowers have been inked, spritz each flower on the front and back with a couple of sprays of water. |
 |
| Crumple each of the flower #10 into a cone shape and let dry. To speed up the drying process you can use a heat gun. I prefer to use a heat gun because I am impatient, but be careful not to burn your paper. |
 |
| Glue the small daisy shaped flower to the top of the large flower. |
 |
| Form the daisy flowers over the blunt end of a bamboo skewer. |
 |
| At this point this is how all of your pieces should look. Allow to dry or use heat gun to dry. |
 |
| After your petals are dry open them up but do not completely flatten. |
 |
| Begin layering your petals from largest to smallest with Tacky Glue. I like to use a bamboo skewer to push down the center of the flowers. If your flower petals are too tightly crumpled it is at this point that you can manipulate the petals into the shape that you want. Gently open the flower petals until you are happy with its shape. |
 |
| After your flower is assembled you can add the center flower stamens. I used some floral sprays that I found in the wedding department at Michael's Craft Store. |
 |
| Cut your flower sprays into smaller pieces. |
 |
| Place a dollop of Fabri-Tac in the center of your flower. |
 |
| Next, add the flower stamens to the center. |
 |
| Your flower is now complete. You can use as is or further embellish with Glimmer mist, glitter, or what ever else you can imagine. Enjoy! |
No comments:
Post a Comment